
Tire Inflators: How to Choose and Use a Portable Car Air Pump
Find a practical inflator for your vehicle and routine. Compare three models, understand their power options and follow a clear process for pressure checks and top-ups.
By Auto Gear Pilot · Product information checked October 2, 2026.
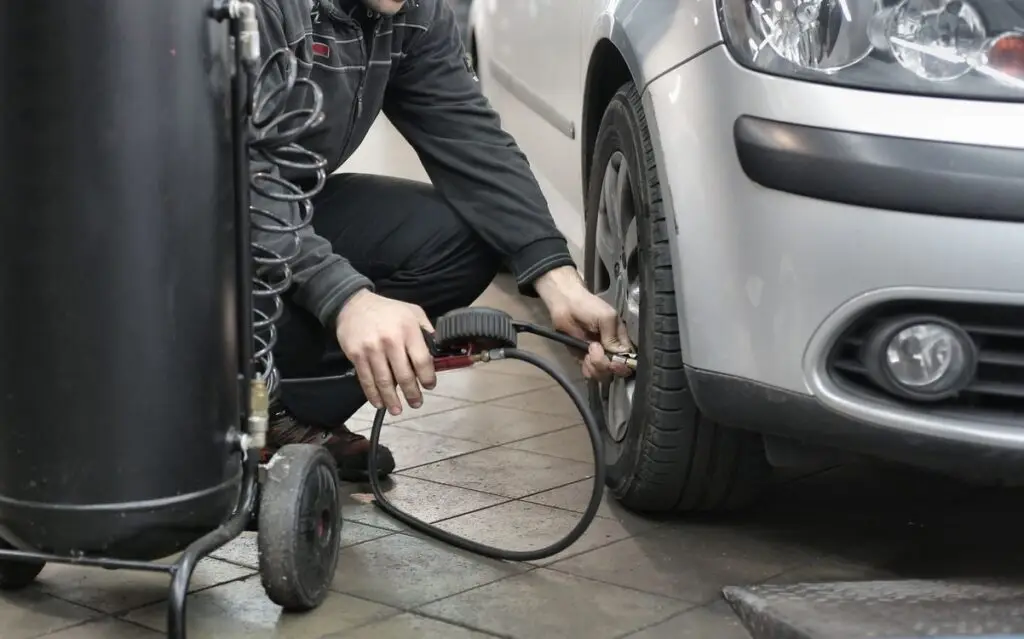
How we made this guide: We checked manufacturer product information and instructions, and read published buying guides. We have not tested these inflators ourselves. Use the comparison to make a shortlist, then confirm the exact package, vehicle fit and instructions before buying.
Quick Answer
Tire inflators help you add air to a low tire, but they do not repair damage. Choose a model that suits your vehicle, power source and storage space. Check the vehicle’s recommended cold-tire pressure, then compare reach, controls and operating limits. Keep a separate gauge and follow the inflator’s instructions.
Key Takeaways
- Start with your vehicle’s pressure requirements and tire size, rather than the highest PSI on the box.
- Choose a power source you can keep ready: an internal battery, an existing tool battery or a compatible vehicle outlet.
- Auto-stop is helpful, but stay with the inflator and verify the final reading with a tire-pressure gauge.
- Compare the whole package, including charging equipment, adapters, hose reach and storage.
- An inflator adds air. Recurring pressure loss, tire damage and an unsafe roadside position need a different response.
What Is a Tire Inflator?
A tire inflator is a pump that moves air into a tire through its valve. Many portable models combine a small electric compressor, a hose and a pressure display in one unit. You connect the hose, select the correct setting and run the pump to add air. The controls, power requirements and stopping procedure depend on the model.
For most drivers, the everyday job is a top-up: bringing a tire that is a little low back to its recommended pressure. That is different from filling a completely empty tire. A full inflation job asks the pump to move much more air and can take longer, use more battery and generate more heat.
The terms portable air compressor, car air pump and tire inflator often overlap in product listings. Read the actual application list. A small device intended for passenger-car tires is not automatically suitable for larger truck tires, air mattresses or air-powered workshop tools.
You do not need every extra feature to do a simple pressure check. A clear display, a sound valve connection and a suitable power supply matter first. A light, carrying case or additional nozzle can be useful, but only if the basic tire-inflation task fits the product’s instructions.
Why Keep a Tire Inflator in Your Car Kit?
Having an inflator available can make routine tire care easier. You can check pressures at home and add air without planning a separate stop at a service station. It is also useful before a road trip, when you are already checking lights, fluids, luggage and other travel essentials.
The practical benefit is access to air when you have a suitable place to work. It does not mean every roadside situation is safe to handle yourself. Traffic, poor visibility or a damaged tire can make roadside assistance the better next step.
Correct pressure helps tires work as intended. Use the vehicle manufacturer’s guidance and keep checks consistent, rather than waiting for a tire to look low. The NHTSA TireWise guide is a useful starting point for passenger-vehicle tire care.
An inflator works best as part of a small, organized kit. Keep a tire-pressure gauge, the correct charging or power lead, the manufacturer’s instructions and your assistance details together. If several people drive the car, show them where the kit is stored and how its power source works.
Tire Inflator Features That Matter
Power source and charging
Check what actually runs the motor. An internal rechargeable battery, a removable tool battery and a vehicle’s 12V outlet are different options. A product can offer more than one, but the included package may not contain everything needed for every option.
For a cordless model, ask how you will recharge it and whether the necessary cable or charger is supplied. For a corded model, check the vehicle outlet and cable route before buying. If an optional mains adapter is offered, confirm that it is the correct accessory for the exact model and local power supply.
Pressure range and suitable tire sizes
Maximum PSI is a pressure ceiling, not a speed rating or a promise that the inflator suits every vehicle. Tire size, the amount of air needed and the pump’s operating limits also matter. Start with the application guidance for the inflator and the requirements for your vehicle.
If your vehicle has large tires or you expect to inflate several tires in succession, look for clear information about that workload. Do not use a compact car-pump description as evidence of truck or RV suitability.
Airflow and inflation-time claims
A small top-up and a full inflation are different tests. When a brand publishes a time, look for the tire size, starting pressure and finishing pressure. Without those details, a headline time tells you little about your own car.
Different brands may use different test conditions. This guide does not combine their advertised times into a fastest-to-slowest ranking. Use comparable independent tests when speed is your main concern, and check whether those tests resemble your intended job.
Display, presets and auto-stop
A readable screen and simple controls reduce setup frustration. Check that you can choose the unit you use and adjust the target yourself. A car preset is a starting point in the controls; it is not confirmation of the correct pressure for your particular vehicle.
Auto-stop is a convenience feature, not a reason to walk away. Check which operating modes support it. For example, the DEWALT DCC020I manual distinguishes tire-inflation controls from its high-volume mode.
Hose, valve connector and reach
The hose must reach the valve without pulling hard on it. Check the power cable too, if the unit uses a vehicle outlet. Consider all four wheels and the positions the valves may be in when you park.
A screw-on connector and a clamp connector have different handling steps. Neither description alone proves a leak-free connection. Look at the instructions, check the seal during use and make sure any required valve adapter is part of the package.
Operating limits, storage and support
Find the permitted run time, cooling instructions and storage conditions in the manual. These details are more useful than assuming the unit can run continuously. Also check how the hose and cables pack away, whether accessories have a fixed place and how you obtain replacement parts.
Compare support and warranty terms for the seller and region you will use. A clear return policy and accessible instructions are helpful buying information, but they are not proof of long-term reliability.
Common Types of Tire Inflators
There is no single design that suits every driver. Think about where you will use the inflator, how much room you have and how you will power it. These are the main choices you will see when shopping.
Compact rechargeable inflators
These have an internal battery and are easy to carry between tires. Their appeal is a simple setup without a vehicle power cable. The trade-off is readiness: you need to keep the battery charged and understand the supported tire sizes. A charging port does not necessarily mean the pump can run from that port.
Inflators that use removable tool batteries
These can make sense if you already own compatible batteries and a charger. Check the exact battery platform, not just the voltage printed in a listing. A tool-only package may require extra purchases. Consider the space occupied by the inflator, battery and charging equipment together.
Vehicle-powered 12V inflators
These use a compatible vehicle accessory outlet. They avoid a separate internal battery to maintain, but introduce a cable to route. Check the outlet’s electrical rating, cable reach and the instructions for both the car and inflator. Do not assume every socket or adapter can supply the required current.
Higher-output and battery-clamp compressors
Some compressors are designed for bigger tires or repeated work and connect directly to a vehicle battery. They need a different setup from an accessory-socket inflator. Match the product to your tire size and follow the connection instructions. The three models compared below are examples for ordinary car-inflator shopping, not a heavy-duty truck roundup.
Benefits and Limits of a Portable Tire Inflator
The main benefits are convenience, portability and control over when you perform a pressure top-up. A preset display can make it easier to work toward a chosen pressure, while a case keeps the hose and accessories together. Cordless models can also be convenient when moving around a parked car.
The limits are just as useful to understand. Inflation takes time, small pumps have operating limits and batteries need attention. The inflator cannot tell you that a tire is safe simply because the display reaches a number. Pressure loss can come from a problem that needs inspection.
Think about the whole routine, not only the moment when air enters the tire. You must find a suitable place, confirm the target, connect the hose, monitor the unit and pack it away correctly. A design that makes these steps straightforward for you can be more useful than a device with extras you rarely use.
For home use, measure your storage space and check the available power supply. For travel, check that the kit remains accessible when the boot is loaded. The same inflator may work for both situations, but the power lead, charger and carrying arrangement still need a plan.
How to Choose and Use a Tire Inflator
Before buying, write down your vehicle, tire size, preferred power source and intended job. Is this mainly for occasional top-ups at home, or do you need a kit you can carry on trips? Check the model’s instructions against that list, then check the seller’s package contents.
The following is a general routine. Controls and connection steps vary, so keep the instructions for your exact inflator available.
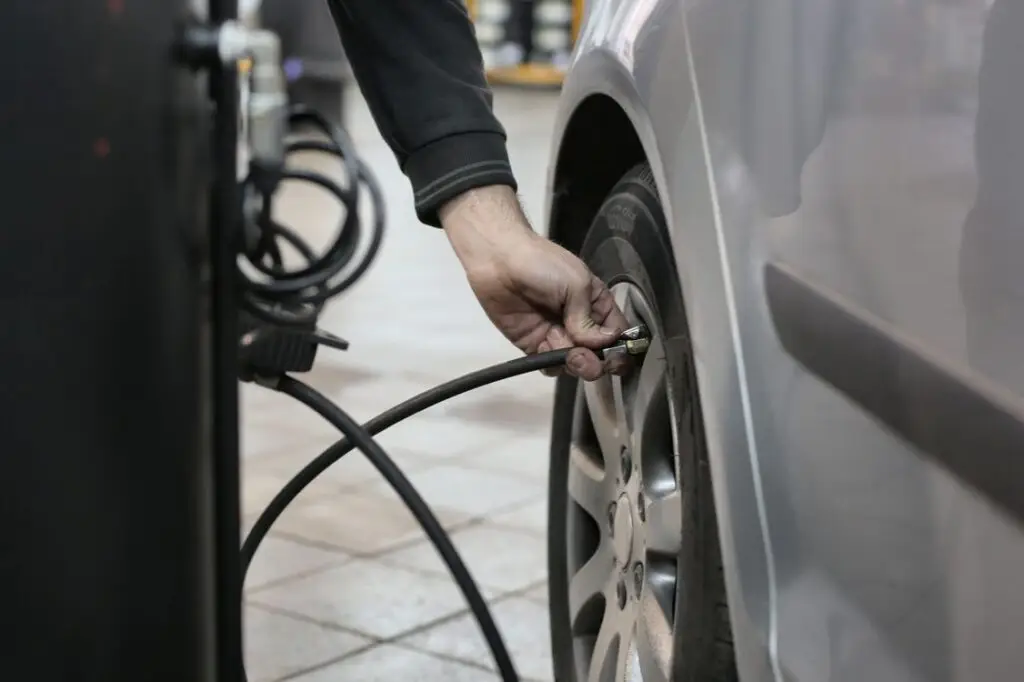
View the original valve-connection photograph. The photograph illustrates a workshop connection, not one of the compared portable models.
1. Choose a suitable place to work
Park on a stable surface, secure the vehicle and keep clear of moving traffic. Make sure you can reach the valve without placing yourself in an unsafe position. If the location is unsafe or the tire appears damaged, stop and arrange appropriate help.
2. Confirm the target and starting pressure
Use the vehicle placard or owner’s manual to confirm the recommended pressure and check whether front and rear settings differ. Take a reading with a tire-pressure gauge. Check cold tires when possible. Michelin’s tire-pressure guide explains cold checks and the recommended-pressure label.
3. Prepare the correct power source
Charge the internal battery, fit the compatible tool battery or connect the approved power lead as instructed. For a vehicle-powered unit, follow the vehicle and inflator manuals. If an engine-running procedure is required, work outdoors; do not run a vehicle engine in an enclosed garage.
4. Connect the hose and check the unit
Remove the valve cap and attach the connector using the correct method. Keep the hose free of kinks and unnecessary tension. Select the pressure unit that matches your target. If the connection keeps leaking, stop and check the fitting rather than trying to compensate by adding more air.
5. Set the target and monitor inflation
Adjust the target to your vehicle’s requirement, rather than trusting a default preset. Stay with the unit while it operates. Follow the model’s run-time and cool-down guidance. Stop if there is a fault or an unexpected problem; automatic shut-off does not replace attention.
6. Verify, disconnect and pack away
After the pump stops, verify the tire pressure with a separate gauge and make any needed adjustment using the correct procedure. Disconnect as instructed, replace the valve cap and repeat for the other tires. Let the inflator cool as required before storing the hose, leads and accessories.
Watch: Tire Pressure Checks and Basic Tire Care
Michelin USA shows how to check tire pressure and measure tread depth. Watch this alongside the steps above, then use the instructions for your exact inflator when connecting power, setting pressure and operating the pump.
Video: How to Check Tire Pressure and Measure Tire Tread Depth, by Michelin USA. A general tire-care tutorial. Open the dedicated video guide
Best Practices for Everyday Tire Care
Build a routine that you can follow consistently. Keep your gauge in an accessible place and record the correct settings for the vehicle you are checking. When the same inflator is used on several vehicles, check each vehicle’s instructions rather than carrying one target across every car.
Check pressure at least monthly and before longer trips. Include the spare where applicable, using its own specified setting. Tire-pressure monitoring is useful, but it does not make a manual check unnecessary. Do not wait for a warning light to build the habit.
Before a trip, confirm that the inflator powers on and that its battery or vehicle power lead is ready. Look for obvious damage to the hose and connector, and check that the charging equipment has not been borrowed for another device. A short readiness check at home is easier than discovering a missing accessory beside the road.
Read the manual before the first use, not during an emergency. Learn how to select units, change the target and stop the pump. Keep a copy of the instructions in the case or save the official manual where you can find it.
If a tire repeatedly needs air, make a note of which tire it is and arrange an inspection. The inflator helps you manage air pressure; it should not become a way to ignore an unresolved tire or valve problem.
Common Tire Inflator Mistakes to Avoid
- Shopping on maximum PSI alone. A high number does not describe airflow, supported tire size or repeated-use capability. Compare the intended application and operating instructions.
- Using the tire sidewall number as the everyday target. Check the vehicle placard or owner’s manual for the recommended cold pressure.
- Accepting a car preset without checking it. Presets are controls supplied by the inflator maker, not settings confirmed for your vehicle.
- Ignoring units. PSI, bar and kPa are different units. Match the display to the specification you are following before you enter a number.
- Comparing unlike speed claims. A small top-up on one tire size does not tell you how another model performs on a larger, emptier tire.
- Assuming a charging socket is a running power input. Confirm how the motor is powered. USB charging does not automatically mean continuous corded operation.
- Buying a tool-only unit without checking the total cost. A battery, charger or optional power adapter can change the cost of a usable kit.
- Running through a cooling break. Follow the exact manual, even if other inflators advertise longer operating times.
- Leaving the pump unattended. Auto-stop can make the task easier, but you still need to monitor it and verify the pressure.
- Treating inflation as a tire repair. Recurring air loss or visible damage needs inspection, not repeated top-ups as a permanent solution.
Compare Three Portable Tire Inflators
These models illustrate different approaches to powering a car inflator. The comparison uses manufacturer product pages and instructions checked on October 2, 2026. It is a specification comparison; we have not tested these units ourselves.
We have not listed a fastest model, battery-life winner or measured accuracy score. Those conclusions need comparable tests. The table focuses on practical differences you can check before buying, including power options, controls and the extra equipment a package may need.
Model names and bundles matter. Check the exact product code, included accessories and current seller information. Prices, availability and customer-review totals change, so use the live listing rather than relying on a fixed number here.
DEWALT DCC020IB
Why compare it: Multiple power options may suit a driver who already owns compatible DEWALT batteries or wants vehicle power available.
Check first: DCC020IB is a tool-only package. Plan for a battery and charger if needed, and check the optional AC adapter separately. Its high-volume mode has different controls from tire inflation.
Fanttik X8 APEX
Why compare it: A compact rechargeable format with a digital display, adjustable presets and automatic stop.
Check first: Match the supported tire sizes and package contents to your job. Its manufacturer’s speed claims have stated test conditions; they are not our measurements. Confirm charging and operating instructions for the version sold.
AstroAI L7
Why compare it: A compact rechargeable unit with a dual-value display, automatic shut-off and LED light.
Check first: AstroAI lists a 4000mAh battery for the L7 and excludes larger truck/RV tires and air mattresses. Check the exact L7 listing; the L7S and L7 Mini are different versions.
Portable Tire Inflators: Pros and Cons
The useful question is whether the complete setup fits your routine. A larger multi-power device can be sensible for one household, while a compact rechargeable unit can be easier for another driver to store. Neither choice removes the need to read the instructions and keep the equipment ready.
What they make easier
- You can add air at home when you have a suitable place to work.
- A portable unit is easier to carry than a full workshop setup.
- Preset controls can simplify working toward a pressure you have already confirmed.
- A case can keep the hose, charging lead and accessories organized.
- Multiple power options can be useful if they match equipment you already own.
What to plan around
- Small pumps still need time and may require cooling breaks.
- Internal batteries need charging and appropriate storage.
- Vehicle-powered models need a compatible outlet and enough cable reach.
- Tool-only packages may need a separate battery, charger or adapter.
- An inflator does not repair a puncture or determine whether a damaged tire is safe.
Buying, Maintenance and Storage Tips
Compare the cost of a working kit, not only the price of the inflator. Include any required battery, charger, adapter or carrying case. If you already own compatible equipment, check that it is genuinely suitable for the model rather than assuming the connection will fit.
Check the seller, product version, warranty coverage and return conditions. Read customer comments for recurring questions about charging, connectors and instructions, but distinguish individual experiences from a controlled test. A review count or star score alone does not tell you how the unit will fit your vehicle.
After use, follow the cooling and cleaning instructions. Inspect the hose and leads for obvious damage. Avoid tight bends or pinching them in the case. Keep the valve adapters and charging cable together so the kit remains complete.
Follow the manufacturer’s battery and temperature guidance when storing a cordless inflator. A car interior can become much hotter or colder than a room. Check the specified storage range instead of assuming year-round boot storage is suitable for every model.
Save the official manual and support details. This makes it easier to check an unfamiliar message, find the correct accessory or confirm a procedure later. If you are organizing a wider maintenance kit, see our car tools guide for other useful basics.
Tire Inflator FAQ
What PSI should I set my tire inflator to?
Use the recommended cold-tire pressure on your vehicle’s placard or in its owner’s manual. Check whether the front, rear or spare tire has a different requirement. Do not use the sidewall maximum or the inflator’s default car preset as a substitute for the vehicle setting.
How long does a portable inflator take to fill a car tire?
It depends on the tire size, starting pressure, target pressure and inflator. A small top-up needs less air than filling an empty tire. Compare published times only when the test conditions match. Allow for the model’s run-time limits and cooling breaks; this guide does not report our own timed tests.
Is a cordless tire inflator better than a 12V model?
Cordless can be easier to carry between wheels, but you need to maintain its charge. A 12V model needs a compatible vehicle outlet and enough cable reach. The better fit depends on your storage and power routine. Check the complete package and how the motor is actually powered.
Can a tire inflator fix a flat tire?
It adds air; it does not repair a puncture, damaged sidewall or faulty valve. A tire that cannot hold pressure needs attention. If a tire looks damaged or the roadside position is unsafe, stop and arrange help. Follow the vehicle’s instructions for any spare or emergency tire kit.
Can I use a compact inflator for an SUV, truck or RV?
Check the exact model’s vehicle and tire-size guidance. Maximum PSI alone does not prove suitability for a larger tire or repeated inflation. AstroAI says the L7 is not suitable for larger truck or RV tires. For those jobs, compare equipment specifically intended for the workload.
What does duty cycle mean on a tire inflator?
It describes the operating and cooling pattern permitted by the manufacturer. The details can depend on the model and conditions. Read the manual for the allowed run time and required rest. Do not borrow a continuous-use claim from another inflator or continue through a specified cooling break.
Do I still need a gauge if the car has TPMS?
Yes. Tire-pressure monitoring alerts you to conditions the vehicle detects, but it does not replace regular manual pressure checks. Keep a suitable gauge and compare its reading with the vehicle’s recommended pressure. A separate gauge also helps you verify the result after using an inflator.
Can I keep a cordless tire inflator in the car all year?
Only within the maker’s storage and battery-temperature guidance. Vehicle interiors can get very hot or cold. Check the specified range, keep the equipment dry and inspect the kit before trips. Recharge and store it as instructed, rather than assuming a permanently stored battery will always be ready.
Final Verdict: Match the Inflator to Your Routine
The most useful tire inflator is one that suits your tires, has a power source you can keep ready and is straightforward for you to use. Begin with those needs, then compare reach, controls, included equipment and operating limits.
The DEWALT DCC020IB is worth comparing when its power options fit your existing setup. The Fanttik X8 APEX and AstroAI L7 illustrate compact rechargeable choices, with their own application limits. Use the table to narrow the options, then read the exact model instructions and seller’s package details.
Keep the pressure-checking routine simple: confirm the correct target, work in a suitable place, monitor the pump and verify the final reading. Store the kit complete and ready. If a tire keeps losing pressure or shows damage, arrange an inspection rather than treating repeated inflation as the solution.
Sources and Editorial Notes
Product information: DEWALT DCC020IB · Fanttik X8 APEX · AstroAI L7.
Use and tire care: DEWALT DCC020I instruction manual · NHTSA TireWise · Michelin tire-pressure guide.
Further reading: Car and Driver’s tested tire inflators · Road & Track’s tested tire inflators. Their testing belongs to their publishers; it is not testing performed by Auto Gear Pilot.
Photographs: Andrea Piacquadio / Pexels — workshop pressure check and valve connection. Used under the Pexels license.
Video: Michelin USA: How to Check Tire Pressure and Measure Tire Tread Depth. This is a general tire-care tutorial, not a 2026 review of the compared models.